
今日有幸得空帮助朋友建设一个wordpress的网站,从域名服务器到wordpress程序安装。废话不多说,域名和服务器购买过程略过。文章源自狐狸影视城-https://fox-studio.net/29313.html
域名,万网购买(39年/首年):www.nuanguang.net文章源自狐狸影视城-https://fox-studio.net/29313.html
服务器,阿里云购买。配置如下图:文章源自狐狸影视城-https://fox-studio.net/29313.html
 文章源自狐狸影视城-https://fox-studio.net/29313.html
学生认证优惠300+元,万网购买域名赠送20元代金卷。共花费79元一年!文章源自狐狸影视城-https://fox-studio.net/29313.html
 文章源自狐狸影视城-https://fox-studio.net/29313.html
文章源自狐狸影视城-https://fox-studio.net/29313.html
前期准备:
使用Amh后台面板(月付6元),支持CentOS 7.0 64位系统。文章源自狐狸影视城-https://fox-studio.net/29313.html
使用加速乐域名解析。文章源自狐狸影视城-https://fox-studio.net/29313.html
服务器系统安装:
登录阿里云网站,上方“管理控制台”进入“云服务器Ecs → 实例 → (选择你购买的实例列表,我是青岛的)→ 更多 → 连接终端”文章源自狐狸影视城-https://fox-studio.net/29313.html
 文章源自狐狸影视城-https://fox-studio.net/29313.html
有时候会提示连接密码,复制后下一个页面粘贴使用。文章源自狐狸影视城-https://fox-studio.net/29313.html
如果黑屏,按任意键激活。文章源自狐狸影视城-https://fox-studio.net/29313.html
 文章源自狐狸影视城-https://fox-studio.net/29313.html
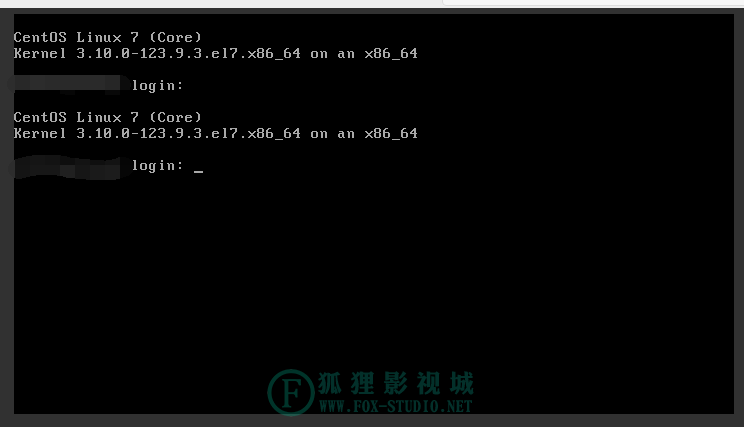
输入购买时设置的服务器密码,就是用户名Root是固定的,密码是自己设置的。文章源自狐狸影视城-https://fox-studio.net/29313.html
需要注意的是,密码输入过程中,光标位置不显示任何符号。输入完成敲击回车!文章源自狐狸影视城-https://fox-studio.net/29313.html
登录成功后,如下图显示!文章源自狐狸影视城-https://fox-studio.net/29313.html
 文章源自狐狸影视城-https://fox-studio.net/29313.html
安装Amh面板
执行Amh安装脚本(我忘记如何粘贴了,还是手动输入吧):文章源自狐狸影视城-https://fox-studio.net/29313.html
- wget http://amh.sh/amh.sh && bash amh.sh 2>&1 | tee amh.log
 文章源自狐狸影视城-https://fox-studio.net/29313.html
然后敲击回车。文章源自狐狸影视城-https://fox-studio.net/29313.html
 文章源自狐狸影视城-https://fox-studio.net/29313.html
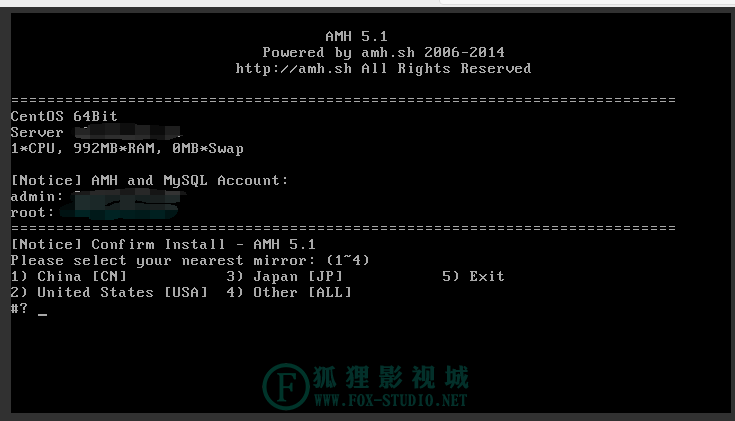
选择使用距离您当前服务器所在位置最佳的amh源码镜像。文章源自狐狸影视城-https://fox-studio.net/29313.html
如果你在中国,请选择1,回车。文章源自狐狸影视城-https://fox-studio.net/29313.html
然后等待完成,大概1-3分钟(以服务器性能为准)。如下图:文章源自狐狸影视城-https://fox-studio.net/29313.html
 文章源自狐狸影视城-https://fox-studio.net/29313.html
成功安装后系统会提示AMH与MySQL默认账号密码。建议截图两个帐号和密码,做备用。文章源自狐狸影视城-https://fox-studio.net/29313.html
可使用普通连接访问面板,http://ip:8888文章源自狐狸影视城-https://fox-studio.net/29313.html
或加密的连接访问面板,https://ip:9999文章源自狐狸影视城-https://fox-studio.net/29313.html
完成后用上面的地址进入管理面板文章源自狐狸影视城-https://fox-studio.net/29313.html
如果安装过程中断开连接:文章源自狐狸影视城-https://fox-studio.net/29313.html
如果安装过程中阿里云终端断开连接。请不要着急,略微等待几分钟,估算应该安装完成后。重新连接终端,提示输入密码,可以通过手机发送验证码修改密码。然后需要重启服务器。文章源自狐狸影视城-https://fox-studio.net/29313.html
之后使用更改后的密码进入终端面板,输入用户名和密码。然后使用下面的代码查看上一次的安装日志。文章源自狐狸影视城-https://fox-studio.net/29313.html
- cat amh.log
在最后,就可以看到如上图的显示,输入用户名和密码进入面板。文章源自狐狸影视城-https://fox-studio.net/29313.html
文章源自狐狸影视城-https://fox-studio.net/29313.html
注册Amh帐号
首次进入,需要登录Amh帐号,注册一个即可。文章源自狐狸影视城-https://fox-studio.net/29313.html
 文章源自狐狸影视城-https://fox-studio.net/29313.html
Amh是付费的,个人用户6元每月即可,如下图文章源自狐狸影视城-https://fox-studio.net/29313.html
 文章源自狐狸影视城-https://fox-studio.net/29313.html
充值后,点击确认购买。然后重新 http://ip:8888 进入管理面板,这下就可以使用了。文章源自狐狸影视城-https://fox-studio.net/29313.html
 文章源自狐狸影视城-https://fox-studio.net/29313.html
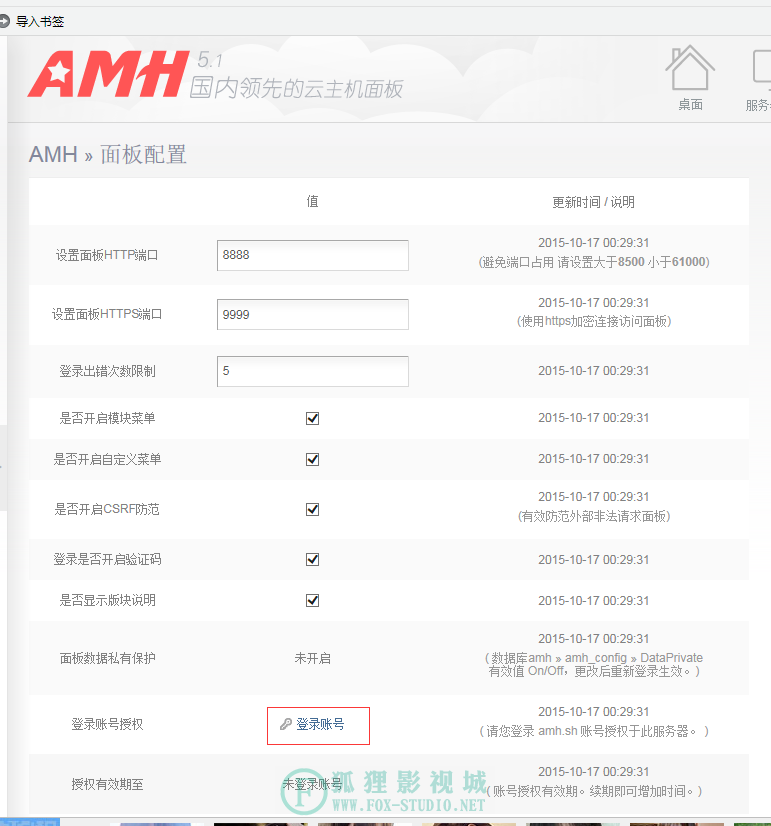
你可以在帐号授权下方,授权有效期栏目中,点击“授权续期”来购买更久的时间。文章源自狐狸影视城-https://fox-studio.net/29313.html
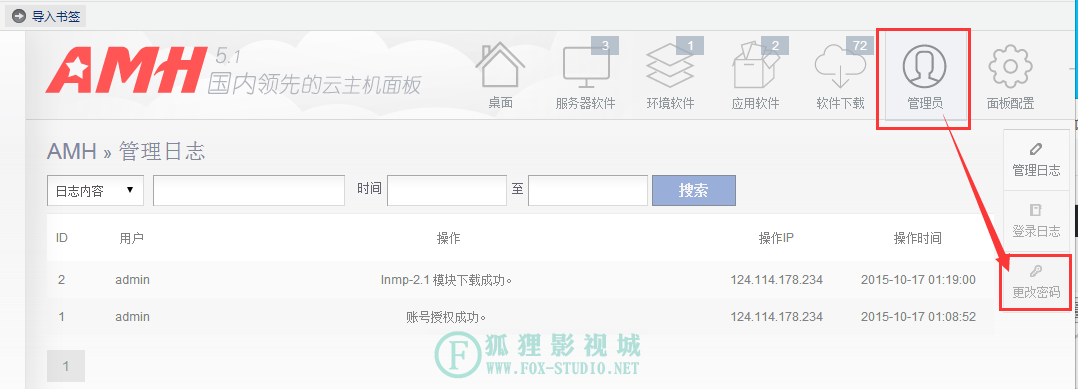
然后在导航栏中选择管理员,页面右面的浮动栏中,修改面板的登录密码。文章源自狐狸影视城-https://fox-studio.net/29313.html
 文章源自狐狸影视城-https://fox-studio.net/29313.html
文章源自狐狸影视城-https://fox-studio.net/29313.html
安装服务器运行环境
进入桌面,点击“桌面程序下载”。选择“WEB运行环境应用”分类,点击搜索。文章源自狐狸影视城-https://fox-studio.net/29313.html
 文章源自狐狸影视城-https://fox-studio.net/29313.html
如果你懂得,可以自己选择,如果你不懂,就选择截图中的第一个下载。文章源自狐狸影视城-https://fox-studio.net/29313.html
进入“环境软件”导航,安装刚才下载的Lnmp应用。文章源自狐狸影视城-https://fox-studio.net/29313.html
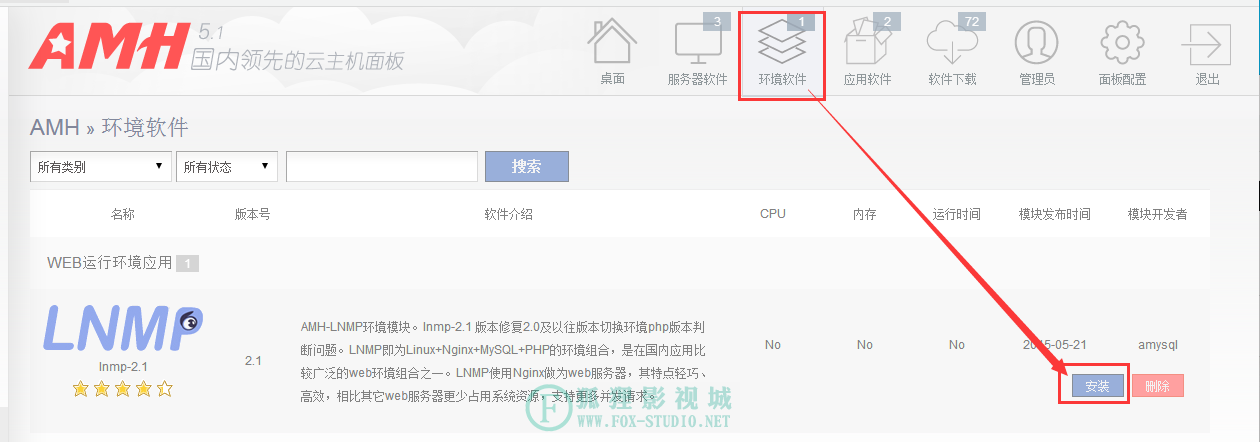 文章源自狐狸影视城-https://fox-studio.net/29313.html
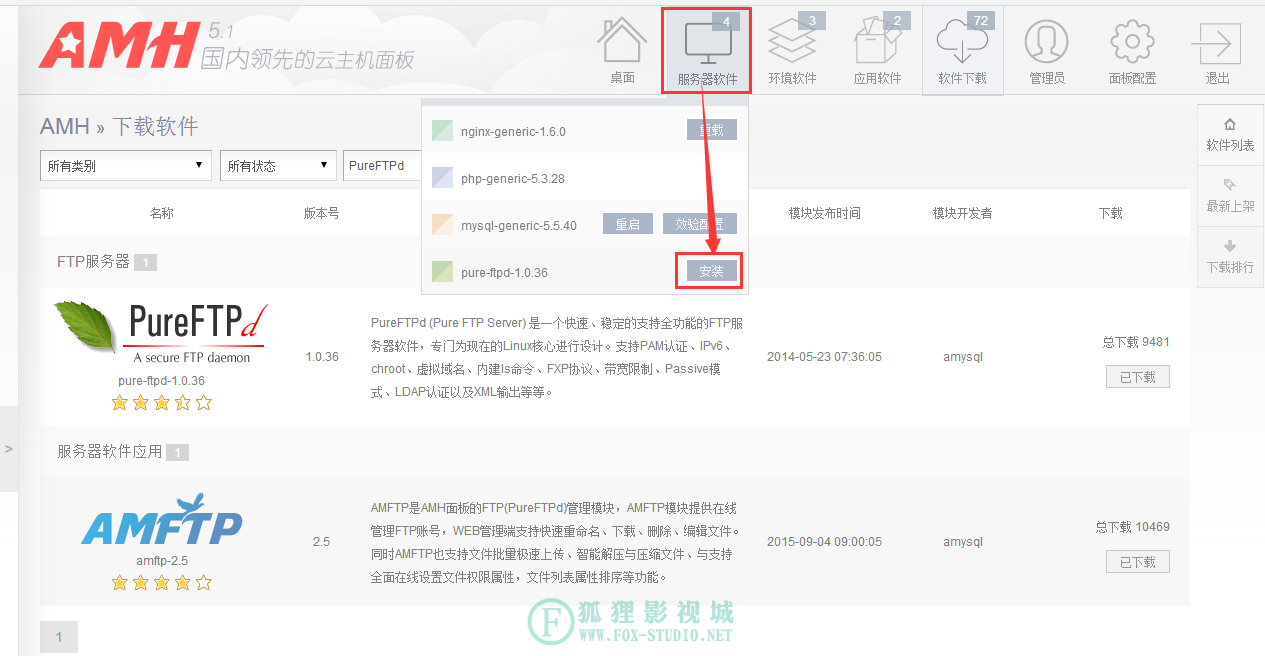
安装完成后,返回列表。再进入“软件下载”导航中。下载Ftp应用,可以使用ftp连接服务器上传下载网站文件的服务应用。文章源自狐狸影视城-https://fox-studio.net/29313.html
 文章源自狐狸影视城-https://fox-studio.net/29313.html
鼠标放在“环境软件”导航上,安装Amftp。文章源自狐狸影视城-https://fox-studio.net/29313.html
 文章源自狐狸影视城-https://fox-studio.net/29313.html
继续返回“软件下载”导航下,直接搜索“phpmyadmin”应用下载。这个是数据库管理应用。文章源自狐狸影视城-https://fox-studio.net/29313.html
 文章源自狐狸影视城-https://fox-studio.net/29313.html
下载之后,继续在“环境软件”导航下安装“phpmyadmin”数据库管理应用。最后“环境软件”分类下应该有如下应用安装成功。文章源自狐狸影视城-https://fox-studio.net/29313.html
 文章源自狐狸影视城-https://fox-studio.net/29313.html
以上是一般网站服务器所必须的功能。然后在Lnmp后面点击“创建环境。勾选所有的复选框。文章源自狐狸影视城-https://fox-studio.net/29313.html
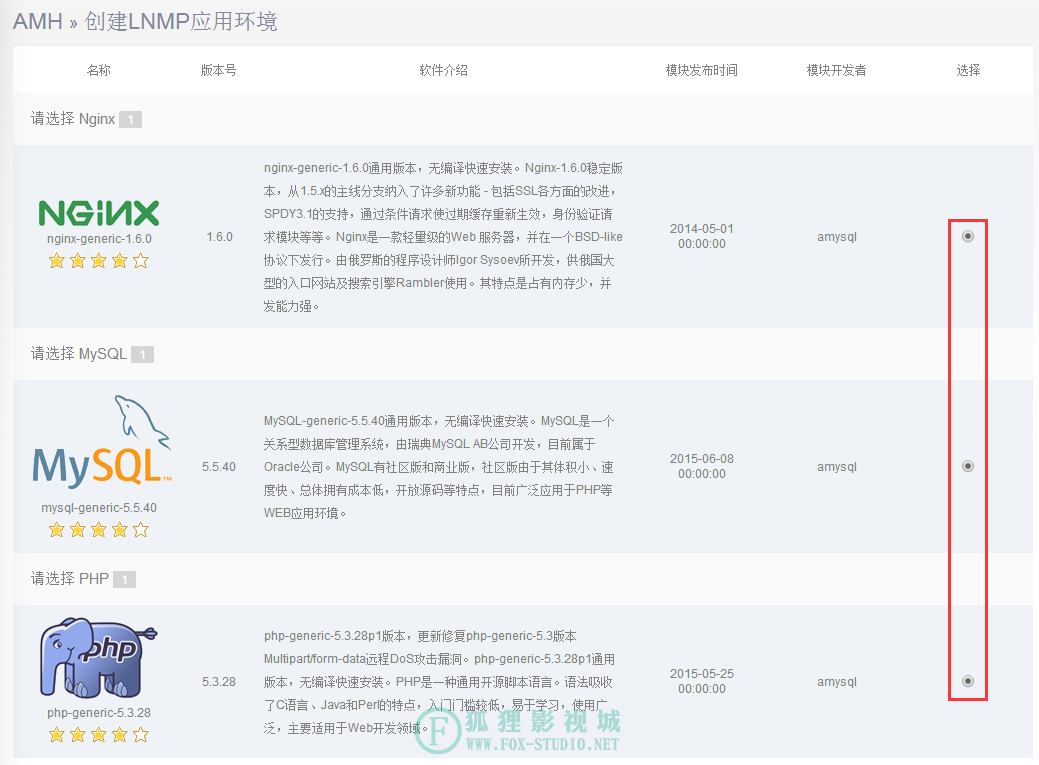 文章源自狐狸影视城-https://fox-studio.net/29313.html
填写环境名称,这个随意。文章源自狐狸影视城-https://fox-studio.net/29313.html
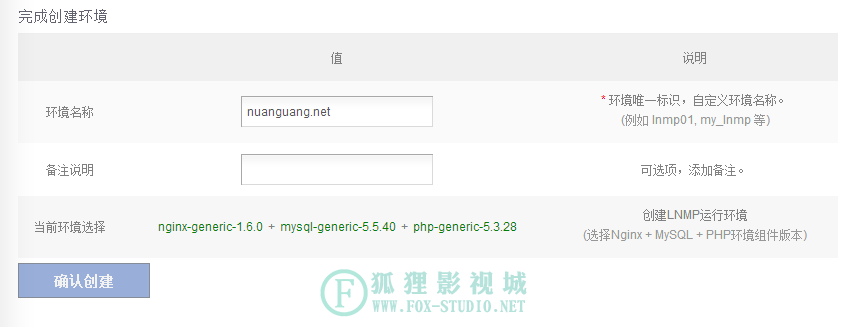 文章源自狐狸影视城-https://fox-studio.net/29313.html
之后点击确认创建即可。然后进入管理界面。根据自己的域名进行设置,参考下图。文章源自狐狸影视城-https://fox-studio.net/29313.html
 文章源自狐狸影视城-https://fox-studio.net/29313.html
文章源自狐狸影视城-https://fox-studio.net/29313.html
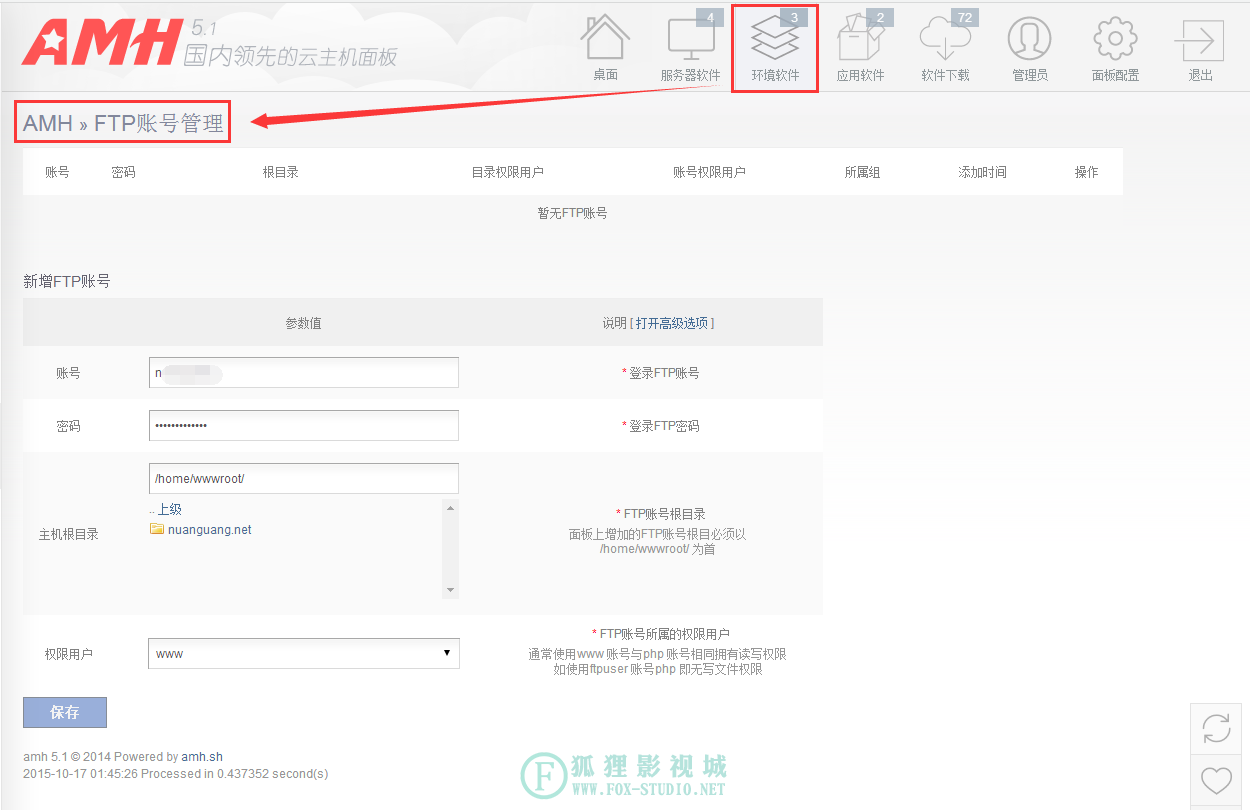
FTP应用安装
接下来进入“环境软件”FTP管理面板。提示“暂无FTP软件 请先搜索安装 PureFTPd 软件”,直接点击那个超链接,下载并安装。文章源自狐狸影视城-https://fox-studio.net/29313.html
 文章源自狐狸影视城-https://fox-studio.net/29313.html
安装完成后,进入“环境软件”中的FTP管理面板。进入“用户列表”创建新的用户,并设置目录。文章源自狐狸影视城-https://fox-studio.net/29313.html
 文章源自狐狸影视城-https://fox-studio.net/29313.html
最后保存。文章源自狐狸影视城-https://fox-studio.net/29313.html
这时,服务器的环境搭建,就完成了。你可以通过直接访问ip地址来查看amh默认的提示页面。文章源自狐狸影视城-https://fox-studio.net/29313.html
 文章源自狐狸影视城-https://fox-studio.net/29313.html
至此完成了三分之一创建,还有Wordpress程序的上传与配置,以及域名的解析等。比服务器的搭建简单很多了。文章源自狐狸影视城-https://fox-studio.net/29313.html
文章源自狐狸影视城-https://fox-studio.net/29313.html
上传WordPress程序
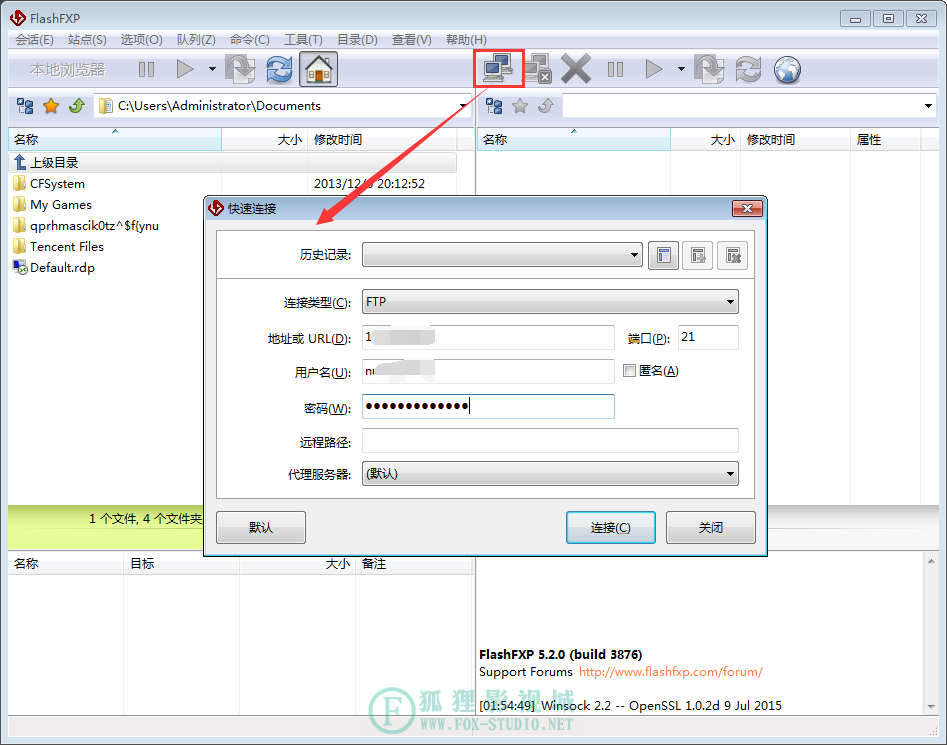
百度搜索并安装Ftp软件,我使用的是“FlashFXP”。百度很多,不提供下载地址了。建议使用绿色版,无需安装破解。文章源自狐狸影视城-https://fox-studio.net/29313.html
接着官方下载WordPress程序文章源自狐狸影视城-https://fox-studio.net/29313.html
打开“FlashFXP”软件,登录刚才设置的Ftp帐号,参考如图。文章源自狐狸影视城-https://fox-studio.net/29313.html
 文章源自狐狸影视城-https://fox-studio.net/29313.html
其中URL为服务器IP,用户名和密码就是在上面的ftp管理中设置的。然后连接。文章源自狐狸影视城-https://fox-studio.net/29313.html
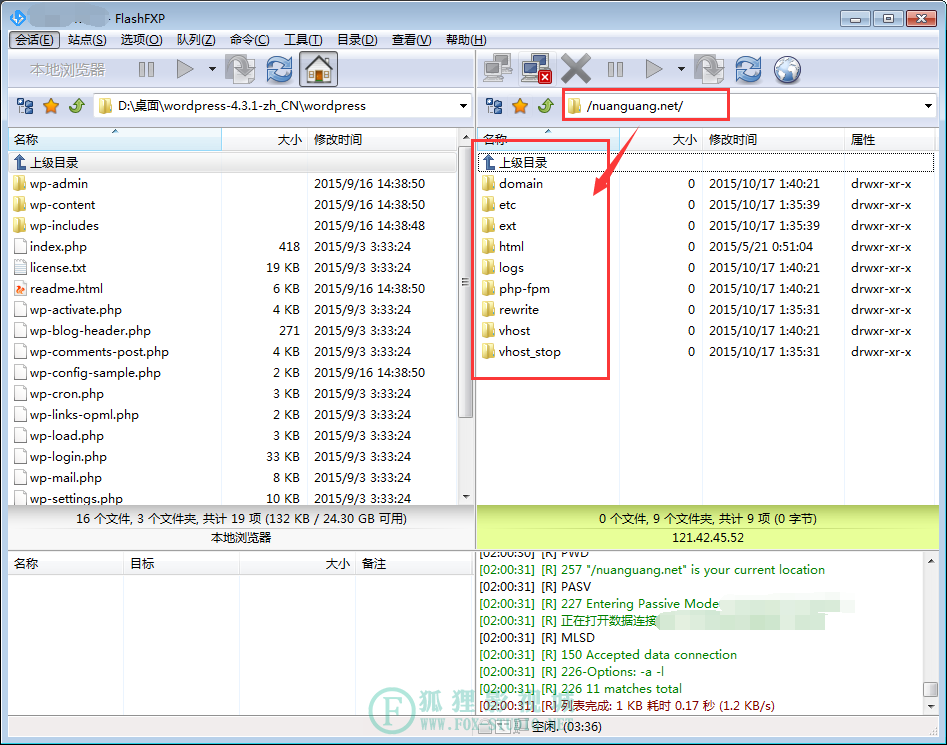
进入根目录“/nuanguang.net/”根据你设置的域名每个人不一样,删除目录中的所有文件。文章源自狐狸影视城-https://fox-studio.net/29313.html
 文章源自狐狸影视城-https://fox-studio.net/29313.html
然后上传解压后的WordPress程序。这个“ ***\wordpress-4.3.1-zh_CN\wordpress”目录中的所有文件,注意不是直接上传Wordpress文件夹,而是上传这个文件夹里面的很多文件,到网站“/nuanguang.net/”目录下。文章源自狐狸影视城-https://fox-studio.net/29313.html
 文章源自狐狸影视城-https://fox-studio.net/29313.html
就是将左边目录中的内容,移动到右边。前提是先删除右边目录中原有的内容。文章源自狐狸影视城-https://fox-studio.net/29313.html
文章源自狐狸影视城-https://fox-studio.net/29313.html
使用加速乐解析域名
注册加速乐(https://www.jiasule.com/)账户。进入右上方“域名管理”。文章源自狐狸影视城-https://fox-studio.net/29313.html
 文章源自狐狸影视城-https://fox-studio.net/29313.html
点击添加域名文章源自狐狸影视城-https://fox-studio.net/29313.html
 文章源自狐狸影视城-https://fox-studio.net/29313.html
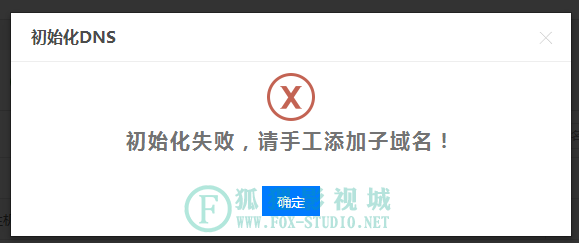
设置你购买的域名,系统默认开始初始化DNS。等待即可,结果是失败。因为域名处,还未设置加速乐的ns地址。文章源自狐狸影视城-https://fox-studio.net/29313.html
 文章源自狐狸影视城-https://fox-studio.net/29313.html
进入阿里云或万网,页面最上方“管理控制台”页面中“域名 → 域名列表”找到需要解析的域名,点击后面的“管理”。文章源自狐狸影视城-https://fox-studio.net/29313.html
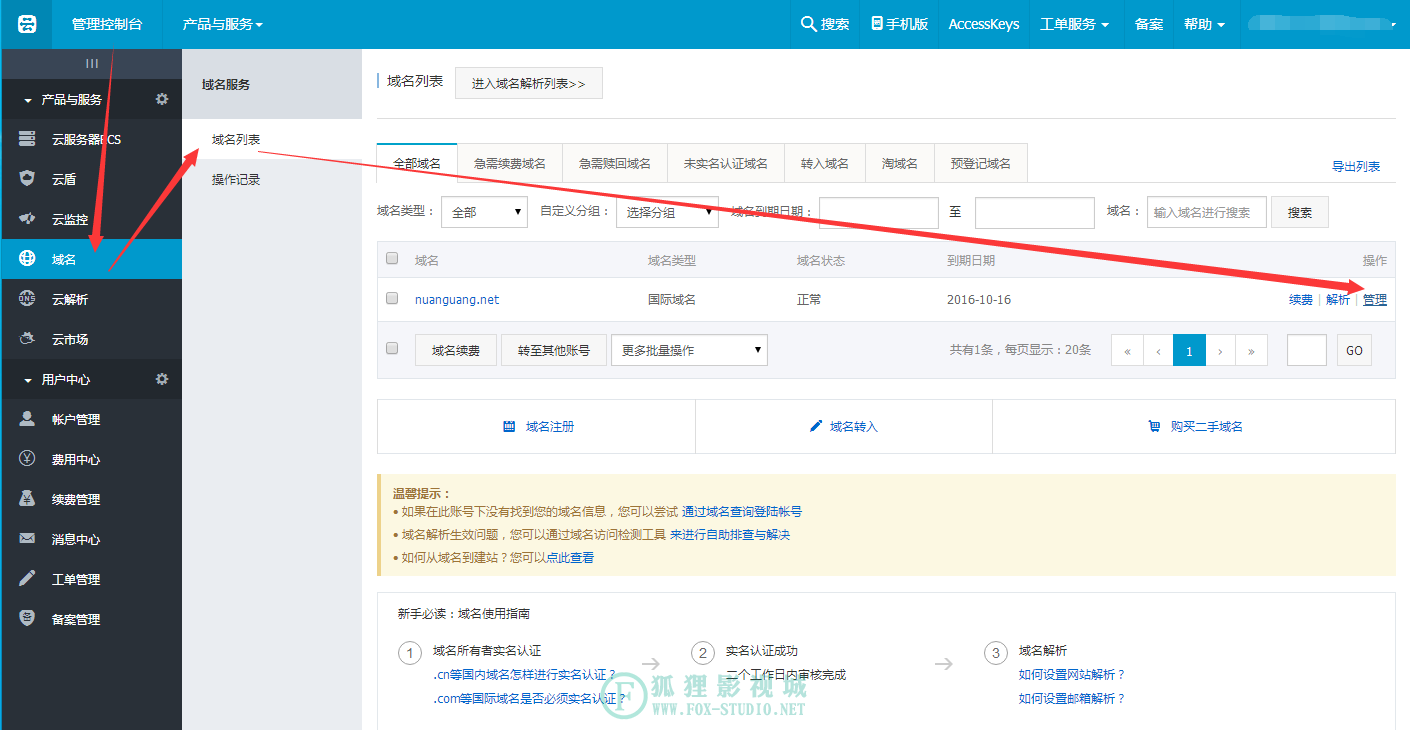 文章源自狐狸影视城-https://fox-studio.net/29313.html
“DNS修改/创建”分类下,“修改域名DNS”。文章源自狐狸影视城-https://fox-studio.net/29313.html
填写加速乐的两个dns地址:ns1.jiasule.net以及ns2.jiasule.net,修改后点击“确认”。文章源自狐狸影视城-https://fox-studio.net/29313.html
 文章源自狐狸影视城-https://fox-studio.net/29313.html
提示生成时间为48小时内,不用管他。接着进入加速乐网站,点击“添加解析”。文章源自狐狸影视城-https://fox-studio.net/29313.html
 文章源自狐狸影视城-https://fox-studio.net/29313.html
类型A记录,主机名www,服务器IP填写自己的,勾选云端模式。点击“添加”文章源自狐狸影视城-https://fox-studio.net/29313.html
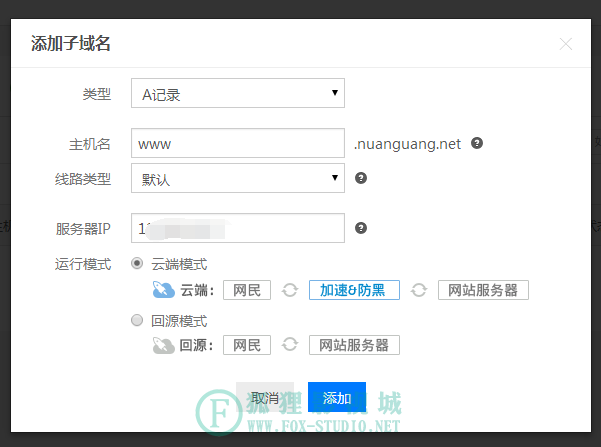 文章源自狐狸影视城-https://fox-studio.net/29313.html
再一次添加解析,和上面设置一样,唯一不同的是,设置主机名为@。文章源自狐狸影视城-https://fox-studio.net/29313.html
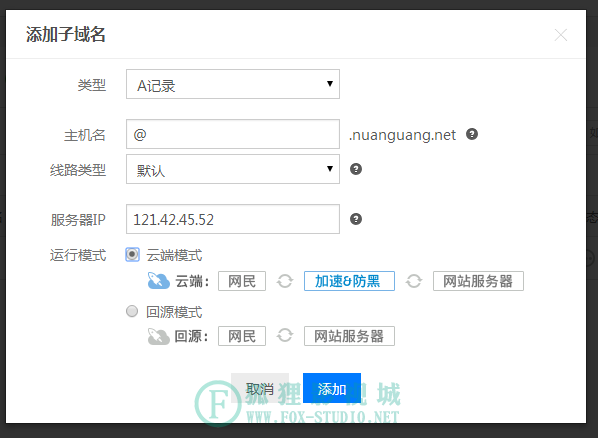 文章源自狐狸影视城-https://fox-studio.net/29313.html
然后点击“添加”。最后点击立即接入。文章源自狐狸影视城-https://fox-studio.net/29313.html
 文章源自狐狸影视城-https://fox-studio.net/29313.html
继续进行下一步。文章源自狐狸影视城-https://fox-studio.net/29313.html
 文章源自狐狸影视城-https://fox-studio.net/29313.html
然后会跳到该域名的管理页面,这时候,就可以进行“控制面板”的设置了。根据你的需求设置。文章源自狐狸影视城-https://fox-studio.net/29313.html
文章源自狐狸影视城-https://fox-studio.net/29313.html
配置数据库(phpmyadmin)
进入amh面板“环境软件”点击“MySQL管理”,在进入“phpmyadmin”.文章源自狐狸影视城-https://fox-studio.net/29313.html
 文章源自狐狸影视城-https://fox-studio.net/29313.html
在“新建数据库”下面填写数据库名称(最后创建时,我改变了填写的名称),你可以随意。建议使用域名,方便区分。点击创建。文章源自狐狸影视城-https://fox-studio.net/29313.html
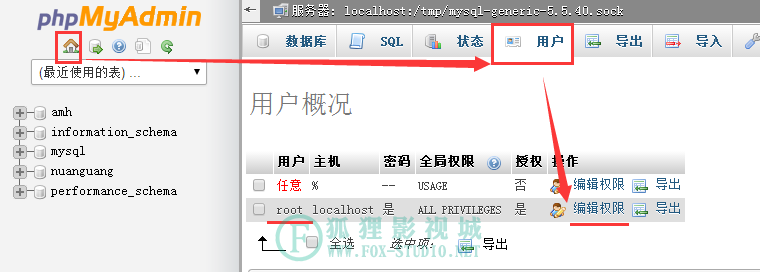
点击左边“主页”图标,然后进入“用户”分类。重新设置root用户的密码,也就是安装完成amh后,和amh面板登录密码在一起的,另一个账户名和密码。文章源自狐狸影视城-https://fox-studio.net/29313.html
这里我直接修改root的登录密码,点击用户后面的“编辑权限”。文章源自狐狸影视城-https://fox-studio.net/29313.html
 文章源自狐狸影视城-https://fox-studio.net/29313.html
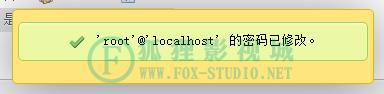
找到密码修改的分栏,修改后点击执行。文章源自狐狸影视城-https://fox-studio.net/29313.html
 文章源自狐狸影视城-https://fox-studio.net/29313.html
 文章源自狐狸影视城-https://fox-studio.net/29313.html
然后打开WordPress目录找到“wp-config-sample.php”文件打开,并修改其中的内容。文章源自狐狸影视城-https://fox-studio.net/29313.html
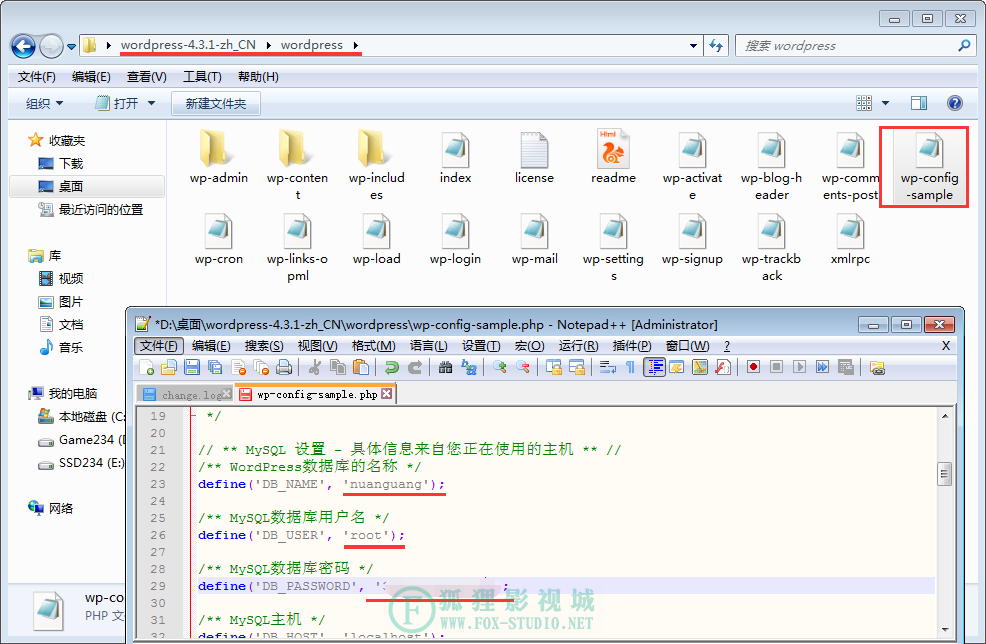 文章源自狐狸影视城-https://fox-studio.net/29313.html
注意,php文件最好不要用文本文件打开。推荐使用NotePad++,百度搜索一大堆。然后通过Ftp上传并覆盖源文件。文章源自狐狸影视城-https://fox-studio.net/29313.html
至此,网站服务器和域名已经设置成,接下来就是WordPress的相关配置。文章源自狐狸影视城-https://fox-studio.net/29313.html
在浏览器中输入网站域名www.nuanguang.net,结果我就哭了。文章源自狐狸影视城-https://fox-studio.net/29313.html
 文章源自狐狸影视城-https://fox-studio.net/29313.html
突然想起来,阿里云服务器需要备案才能访问。这下只有让我朋友去准备备案了。文章源自狐狸影视城-https://fox-studio.net/29313.html
WordPress的配置也很简单,你可以百度去搜索。俯拾皆是,下次若有时间了,就接着分享吧。文章源自狐狸影视城-https://fox-studio.net/29313.html

2016年2月10日 下午6:54 3F
您好~这个教程对新手非常有用。我这里做到FTP上传wordpress的时候没有根目录只有1个EOR目录和html目录,该怎么办啊
2015年11月17日 下午3:43 2F
正在寻找你这样的教程,非常感谢
来自外部的引用: 2